Create a distributed volume
Goal
Before you start
- At least two ready nodes in your tenant — a replicated volume with one replica has nothing to fail over to. Check the count and the status on the Nodes screen.
- The
volumes:managepermission to create the volume. The operator role carries it, and admin holds it through its wildcard; no other role does, and the dashboard hides the creation and failover controls without it. See the roles reference. - The
deployments:updatepermission to attach the volume to an existing deployment — the developer and operator roles both carry that one. Note that the permission is not the whole story for the dashboard route below: the deployment’s Edit screen is itself shown only to operator and admin, and a developer who navigates to it directly is sent back. A developer attaches the volume through the YAML manifest or the API instead, both of which accept the samedeployments:update. - The deployment you intend to attach it to, and the container path you want it mounted at.
Steps
Create the volume.
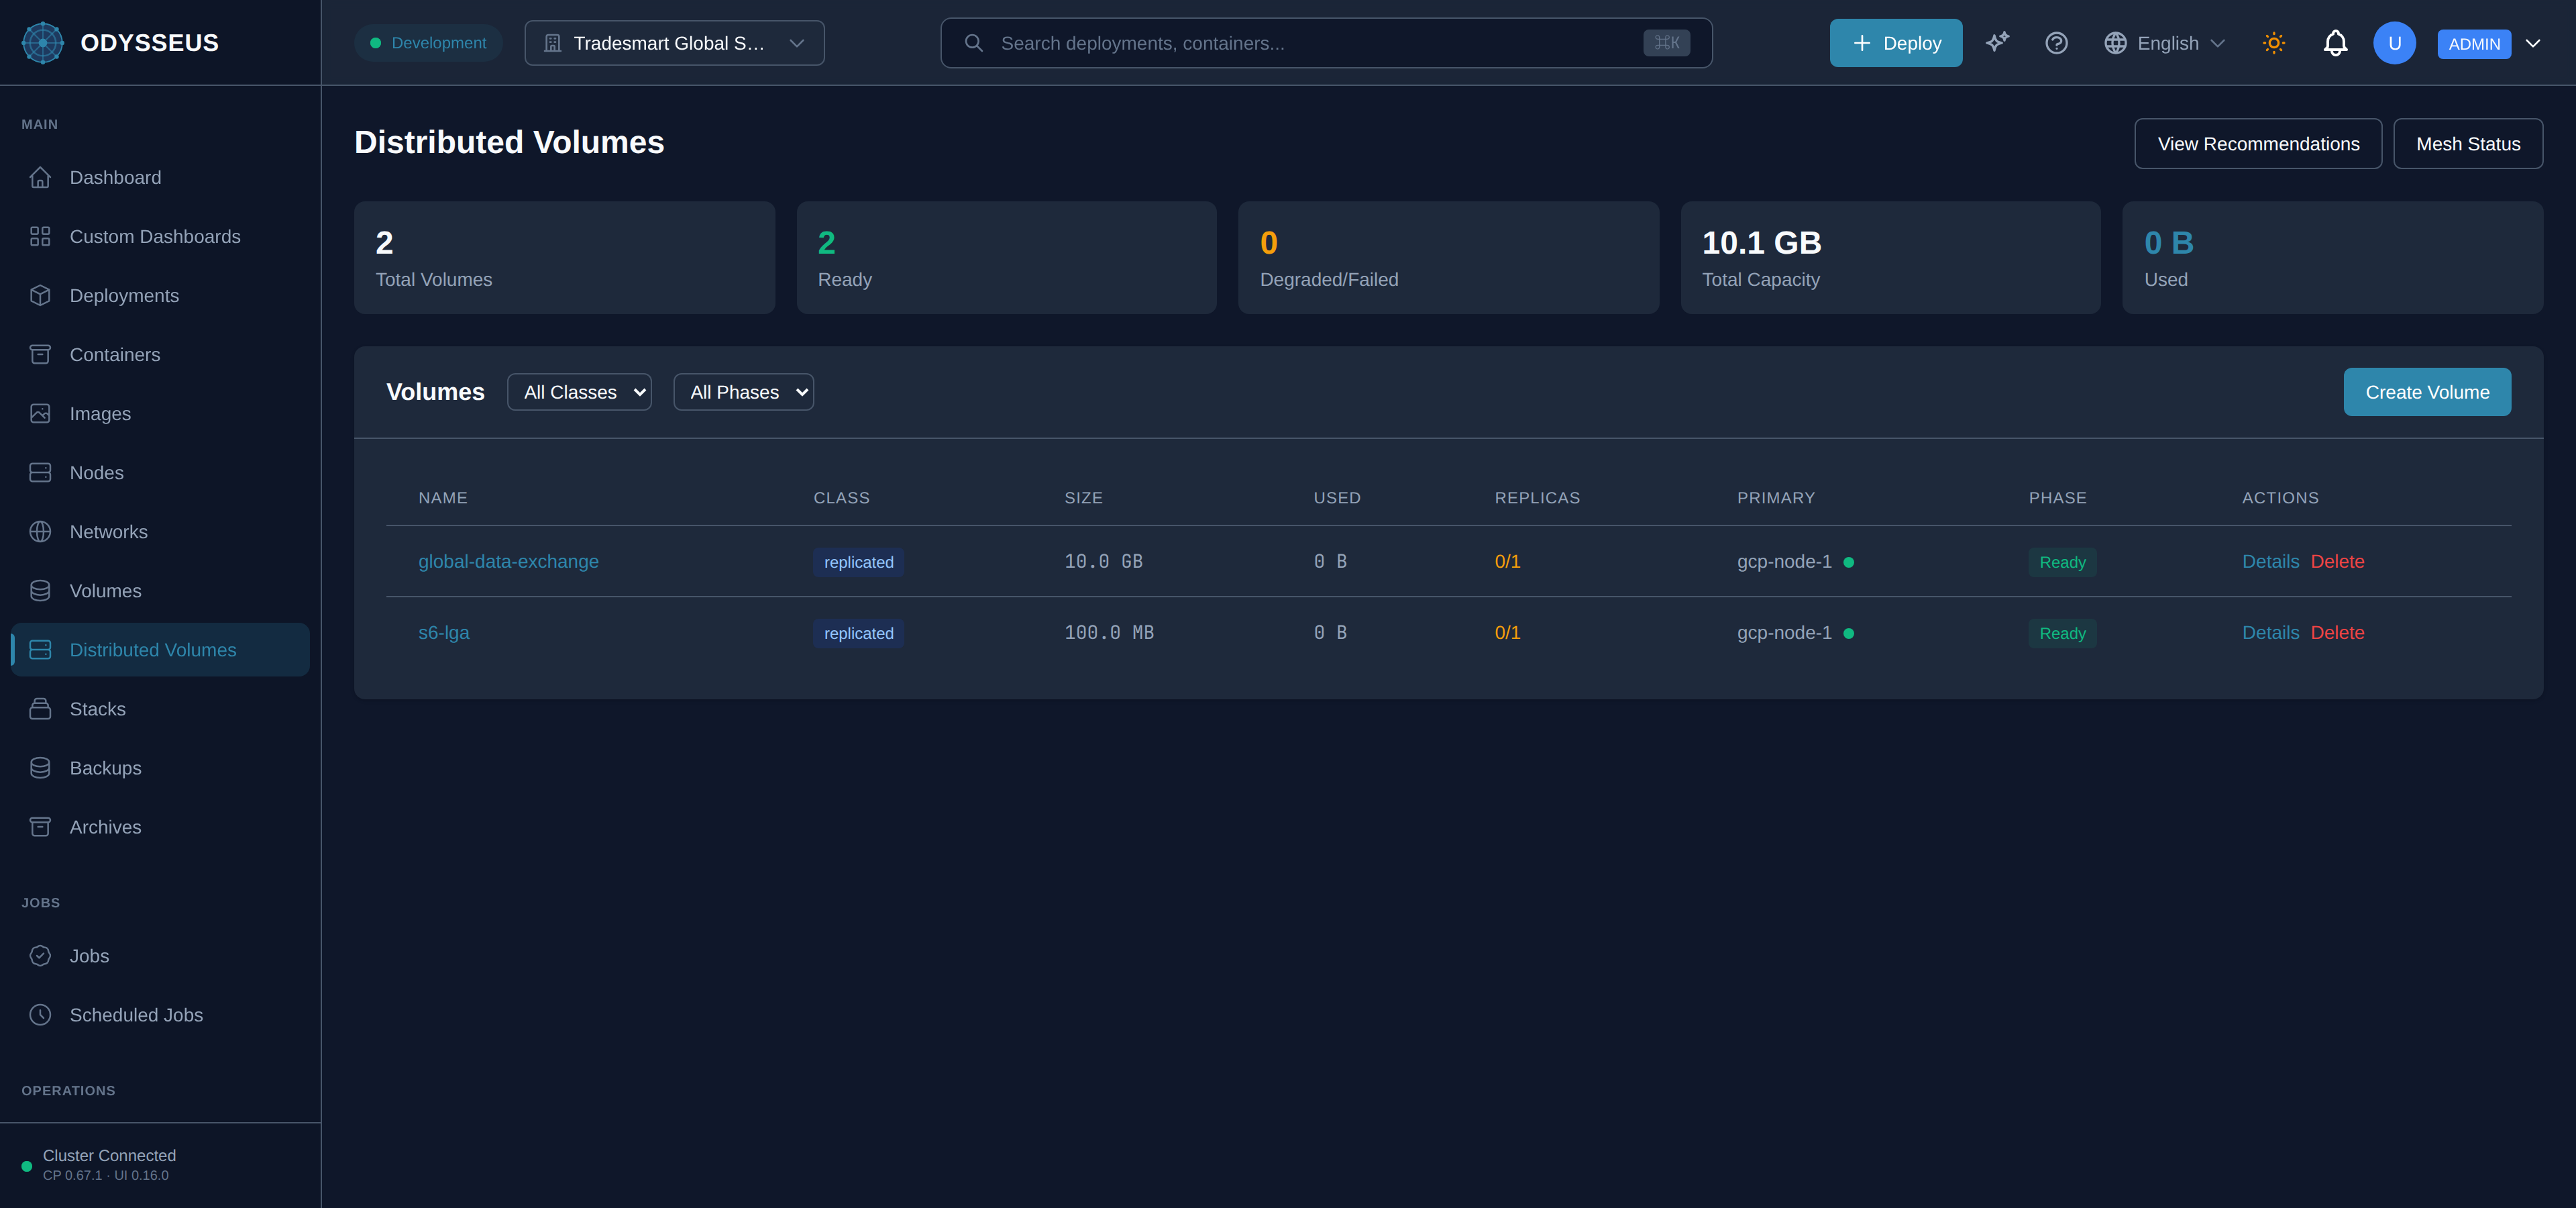
- Open Distributed Volumes in the sidebar — it sits directly below Volumes; see the concept page if you are not sure which one you want.
- Choose Create Volume.
- Name the volume.
- Leave Storage Class on Replicated (Async rsync) — it is the default, and it is the class that gives you a replica count and automatic failover; the other three classes (Ephemeral, Shared, Object) do not take a replica count.
- Raise Replica Count from its default of 1 to at least 2, so there is a healthy copy to fail over to if the primary node goes away.
- The form also exposes Failover policy, Sync interval (seconds) and Access mode. The defaults — automatic failover (which still gates on a verified in-sync replica), a sync every 300 seconds, and ReadWriteOnce, meaning one node mounts it read-write — are right for a first volume; leave them unless you already know why you need otherwise.
- Choose Create Distributed Volume.
- Open the new volume from the list and copy its ID from under the volume’s name. It looks
like
vol-652e949d, and it is what a deployment names the volume by. Wait until the volume’s phase is Ready before going on — a deployment cannot mount one that is still materialising.
Attach it to a deployment.
The deployment form’s Volumes section covers bind mounts, named volumes and tmpfs only; a distributed mount is written in the same screen’s YAML view, which edits the whole description rather than the fields the form exposes.
-
Open the deployment, choose Edit, and switch the toggle at the top of the form from Form to YAML. The box is filled in with the deployment as it currently stands.
-
Add the mount to the
volumeslist —type: distributed, the volume’s ID indistributedVolumeId, and the container path intarget. Write nosource: a distributed mount carries its identity in the ID, and asourcealongside it is refused.This box holds the deployment as the API stores it, not a manifest document, and the two spell a volume differently: here the mount needs
type: distributedand the flag isreadonly, all lower case. The YAML manifest tab shows the other spelling. Pasting a manifest into this box does not work — it is rejected for having no top-levelimage. -
Choose Save from YAML. Only the fields you changed are sent. The mount is checked at this point, not at start-up, so an ID that does not resolve, a volume that is not Ready, or a second read-write claim on the same volume comes back as a refusal naming the field — see When it fails below.
Steps
-
Create the volume first — it is not something a deployment description can bring into being. Use the dashboard, or
POST /api/v1/dvm/volumes, and note the typed ID it returns. -
Add the mount to
spec.volumes. There is notypekey on this surface: the presence ofdistributedVolumeIdis what makes the mount a distributed one, and every plain manifest volume is a bind mount. Note also that the read-only flag is spelledreadOnlyhere, with a capital O.spec.imageis required in every deployment manifest, whether or not you are changing it.apiVersion: odysseus/v1kind: Deploymentmetadata:name: my-appspec:image: nginx:1.27-alpinevolumes:- distributedVolumeId: vol-652e949dtarget: /var/lib/my-appreadOnly: false -
Leave
sourceout. It is the field a bind mount or a named volume uses, and supplying it alongsidedistributedVolumeIdis refused rather than ignored. -
If the deployment also pins an explicit node, that is
spec.placement.nodeon this surface, and it must name the volume’s current primary for a read-write mount. Omitting it is the better answer: placement then follows the volume. -
Apply the document by sending it to
PUT /api/v1/deployments/{name}withContent-Type: application/yaml— the same route and the samedeployments:updatepermission as a JSON update, choosing the format with one header. The document is strict-decoded, so a key this surface does not have is a refusal naming the field and offering the accepted form, never a silently ignored line. The field definitions are in the deployment reference.
Steps
POST /api/v1/dvm/volumesto create the volume, with the storage class and replica count in the body. The response carries the typed ID.GET /api/v1/dvm/volumes/{id}until the volume’s phase isReady.PUT /api/v1/deployments/{name}with avolumeslist containing the distributed mount. Remember that a sent list replaces the stored one outright rather than merging into it, so send every mount the deployment should end up with, not only the new one.GET /api/v1/dvm/volumes/{id}/replicasto read each copy’s role, status and lag.
Verify
The volume is replicating. Open the volume’s detail screen. Every row in the Replicas table shows status in sync, one row has role primary, and Primary Node names one of the nodes you expected to hold a copy. The Replicas card reads n/n in sync. Each row also carries Last Sync and Sync Lag: with the default 300-second interval a lag of a few minutes is the volume working normally, and a lag that keeps growing is not.
The mesh underneath is up. Replication travels over a WireGuard mesh between the nodes. Choose Mesh Status from the Distributed Volumes screen and confirm the WireGuard Peers table lists each node holding a copy, with a recent Last Handshake and Data Sent or Data Received that is not zero. A peer with no handshake is a volume that will not replicate, however healthy the volume’s own page looks. The screen is described in the Distributed Volumes screen reference.
The deployment has it. The deployment’s containers are running, and writing a file at the mount path on the primary node shows up in the replica’s local size on the next sync.
When it fails
A replica never reaches in sync. The node it was assigned to has no room, or cannot be reached — check that node’s status on the Nodes screen before re-creating the volume. If the volume looks healthy but no replica advances, check Mesh Status first: a peer with no recent handshake is the more common cause.
The volume is created with no real redundancy. The create form’s Replica Count defaults to 1, which is a replicated volume with nothing to fail over to. Raise it to at least 2 before choosing Create Distributed Volume.
Create Volume never appears. Your role does not carry volumes:manage — see the
roles reference and your platform operator about a role change.
The mount is refused when you save the deployment. Each refusal names the field, the value it received and the value it wanted; the rejections reference lists them in full. The ones you are most likely to meet:
- the ID does not resolve to a volume this tenant owns — check it against the Distributed Volumes list, and note that a volume belonging to another tenant reads exactly the same as one that does not exist;
- the volume is not in phase Ready — wait for it, rather than mounting storage that may not exist on the target node yet;
- the class is shared or object — only ephemeral and replicated volumes can be dispatched today, and admitting the others would quietly mount node-local storage instead of what the class promises;
- another deployment already mounts it read-write — one writer per volume is the class’s guarantee, so mount read-only or detach the other deployment first;
- the deployment pins a
nodeIdthat is not the volume’s primary — a read-write mount off the primary writes to a replica that the next sync overwrites, so drop the pin and let placement follow the volume.
A node holding a replica goes away. What happens next is decided by the volume’s failover policy — the setting you chose at Failover policy on the create form, shown afterwards as Failover Policy in the volume’s specification panel. There are two outcomes.
It fails over on its own. With the automatic policy, a replica that is in sync and proven current against the failed primary’s last activity is promoted without waiting for anyone. You see it as an event naming the old and new primary, and the volume’s page shows the new primary. There is nothing to do; check afterwards that the volume is back to its full replica count.
It waits for you. With the manual policy, or when no replica is fresh enough to promote safely,
the promotion stops and asks. The Distributed Volumes screen shows a Volume failovers awaiting
approval banner with one row per volume, each carrying Review & approve →; the volume’s own
page shows a Failover awaiting approval banner naming the failed node, the replica proposed,
that replica’s lag and why the automatic path refused it. Choose Approve failover to that node
and the confirmation restates the consequence — approving promotes that replica knowing it is
behind, so whatever it has not caught up on is what you lose. Approval needs volumes:manage.
Nothing is waiting and nothing failed over. The volume is not replicated (an ephemeral volume has no second copy to promote), or no replica exists at all. Check the storage class and the replica count on the volume’s page.